If you are using Super Socializer plugin or Heateor Social Login plugin for Social Login, follow the steps mentioned below to enable Twitch login at your WordPress website.
Steps To Enable Twitch Login
- Login to your Twitch.tv account from this page. Create an account, if you are not already registered.
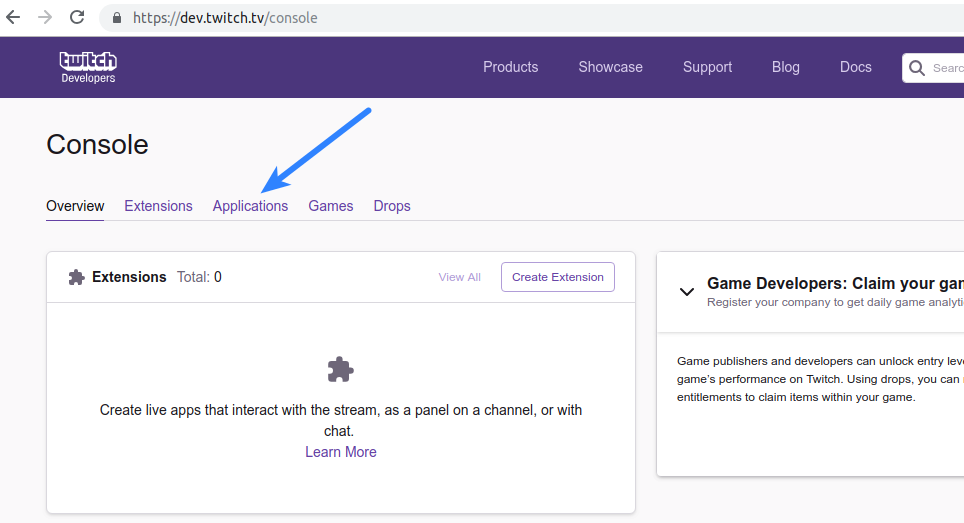
- Navigate to Applications section
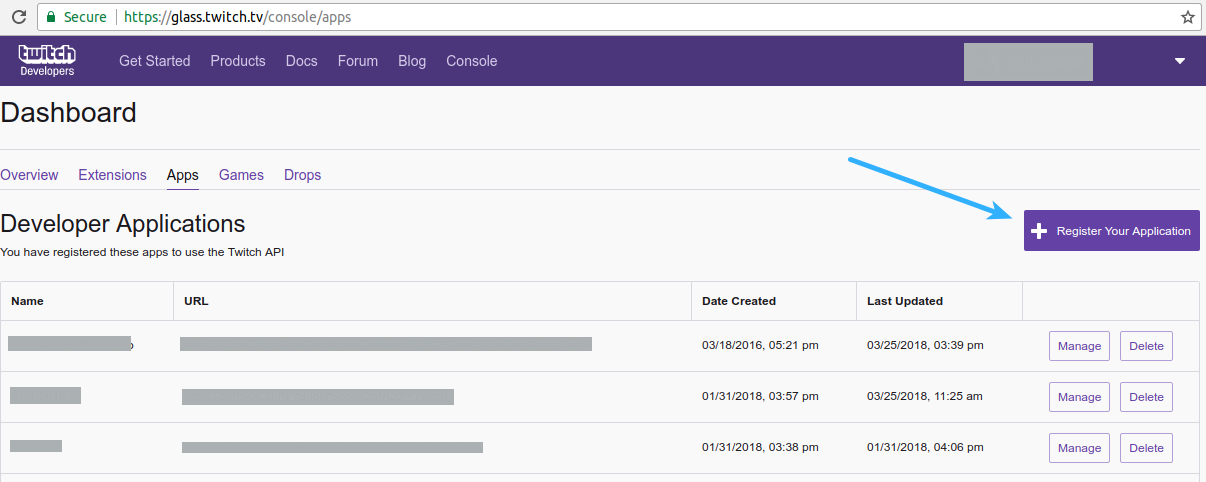
- Click Register your Application button
- Fill the fields as described below
- Name: Give this app a name of your choice. You can specify whatever name you like, but it’s recommended to enter your website or company name in this field
- OAuth Redirect URL: Open your website homepage (at which you have installed the plugin) in browser, click the address bar so that website url gets highlighted, copy this url.
If you are using Super Socializer plugin, append “/SuperSocializerAuth/Twitch” to it,
If you are using Heateor Social Login plugin, append “/HeateorSlAuth/Twitch” to it
and paste in this option. Please make sure that this url includes http:// or https:// (for example: if homepage of your website is http://mywebsite.com then you have to paste http://mywebsite.com/SuperSocializerAuth/Twitch or http://mywebsite.com/HeateorSlAuth/Twitch URL in this option) - Category: Choose Website Integration
- Click Create button
- Click Manage in front of the app you just created
- Copy Client ID and save it in Twitch Client ID option at Super Socializer > Social Login page in admin area of your WordPress website. Click New Secret button
- Click OK in the confirmation dialogue and copy-paste the Client Secret in Twitch Client Secret option at Super Socializer > Social Login page in admin area