If you are using Super Socializer plugin or Heateor Social Login plugin for Social Login, follow the steps mentioned below to generate Windows Live Client ID and integrate Microsoft Login with your WordPress website.
Steps To Generate Windows Live Client ID
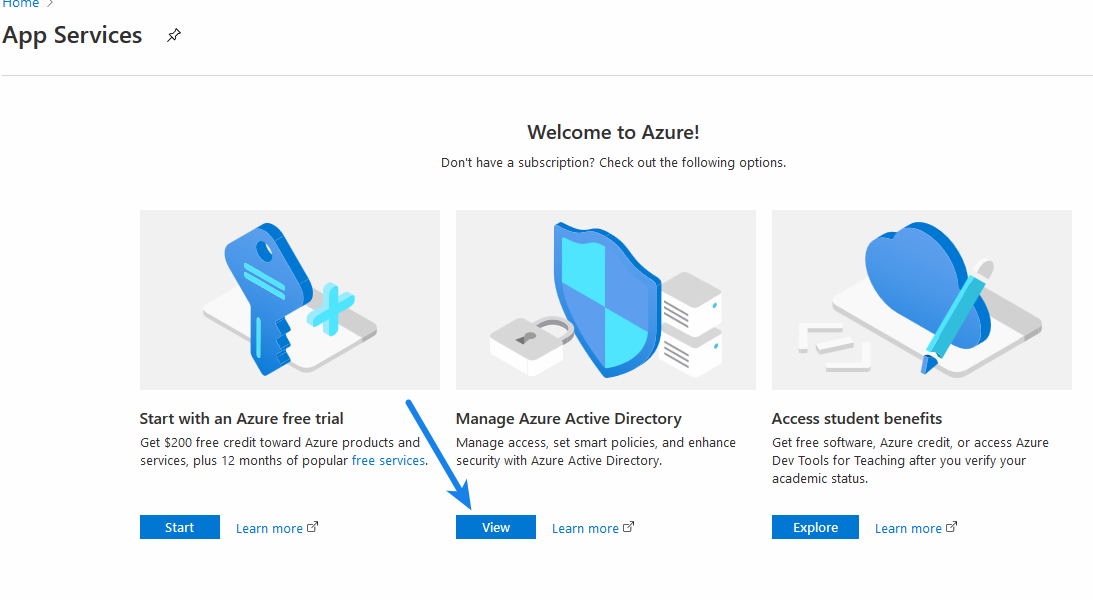
- Navigate to Microsoft Azure Portal and login via your Windows Live or Microsoft account. If you don’t have a Microsoft account, you need to create one first.
- Click View button in the Manage Azure Active Directory section.
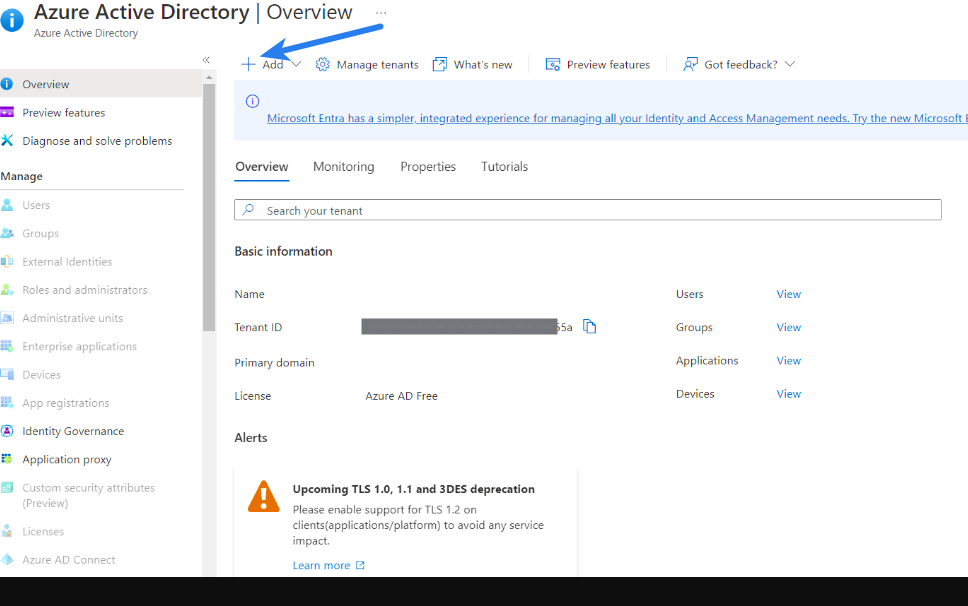
- Click Add in the menu
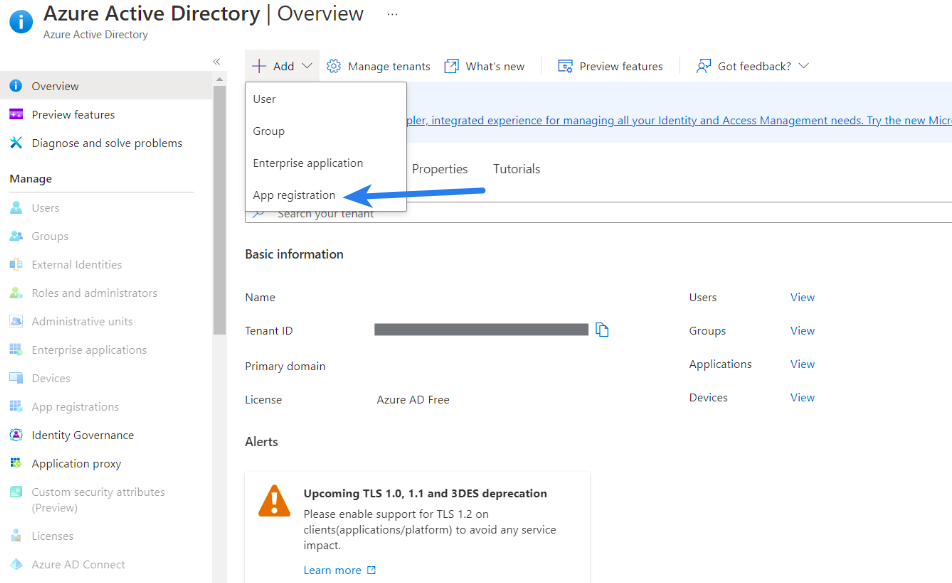
- Click App registration.
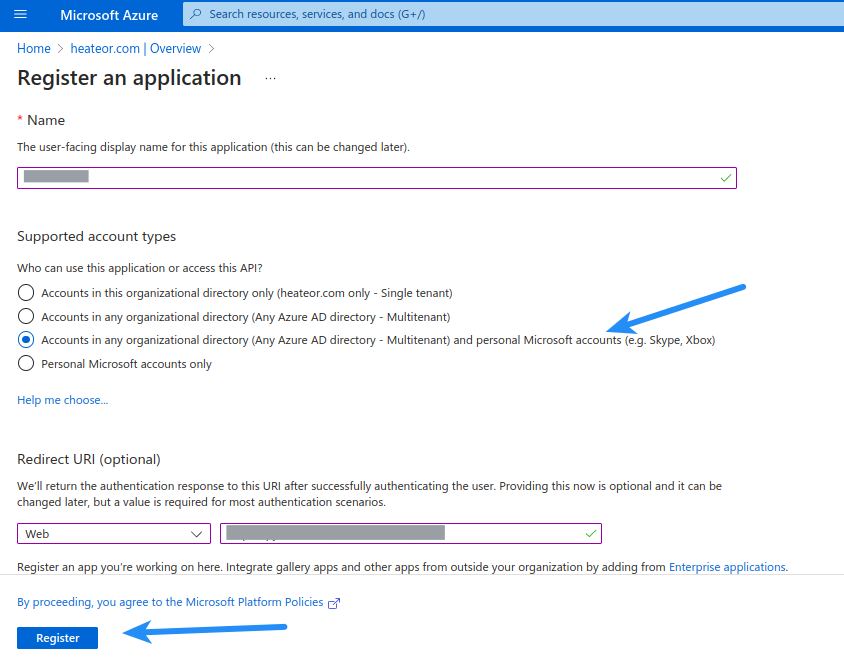
- Name your new app and select Accounts in any organizational directory (Any Azure AD directory – Multitenant) and personal microsoft accounts (e.g. Skype, Xbox) as supported accounts types.
If using Super Socializer plugin, save HOMEPAGE_URL/SuperSocializerAuth/Live as the redirect uri.
If using Heateor Social Login plugin, save HOMEPAGE_URL/HeateorSlAuth/Live as the redirect uri.
Replace HOMEPAGE_URL with url of homepage of your website. So, if URL of the homepage of your website is https://mywebsite.com, you need to save https://mywebsite.com/SuperSocializerAuth/Live or https://mywebsite.com/HeateorSlAuth/Live as the redirect uri.
Click on Register.
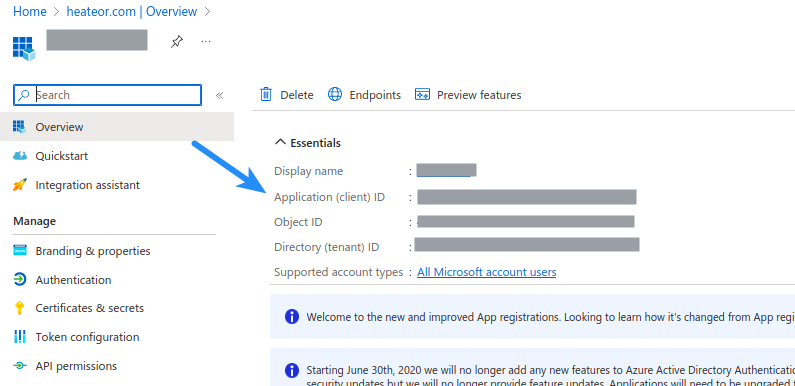
- Navigate to Overview section from the menu in the left side. Copy Application (client) ID and paste it in Microsoft Client ID option in the Social Login section of plugin.
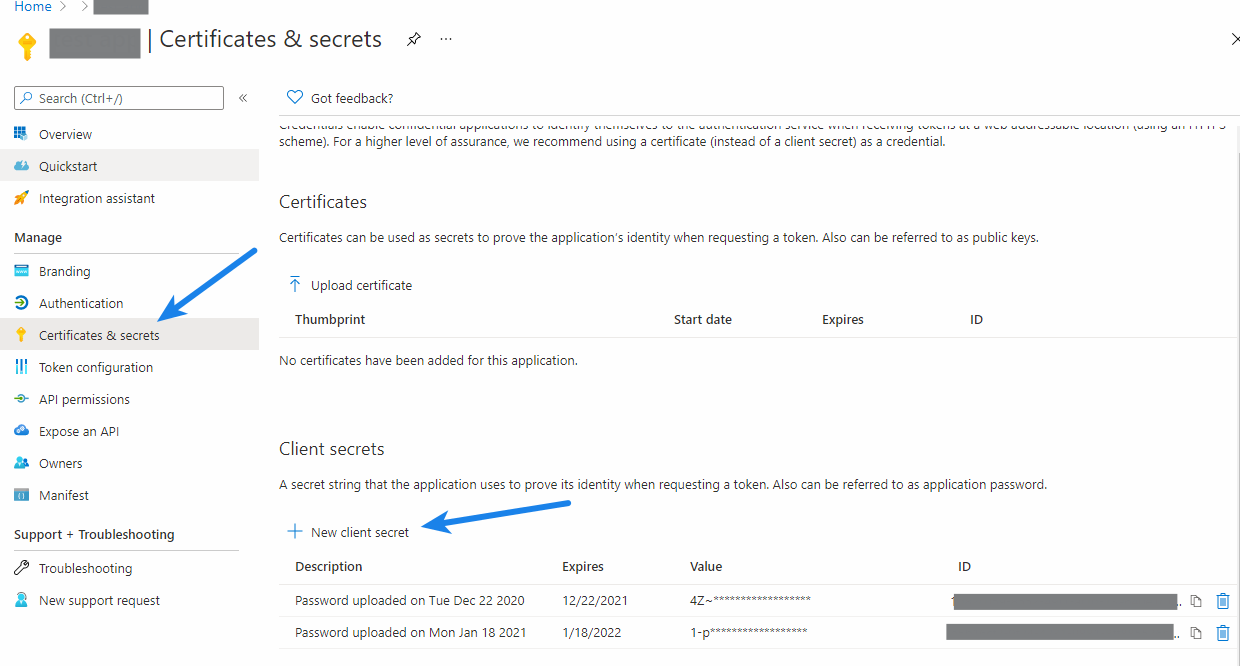
- Navigate to Certificates and secrets section from the menu in left sidebar. If you already have two secrets added, you need to delete one, as there can be maximum two client secrets for an app. Click on New client secret button
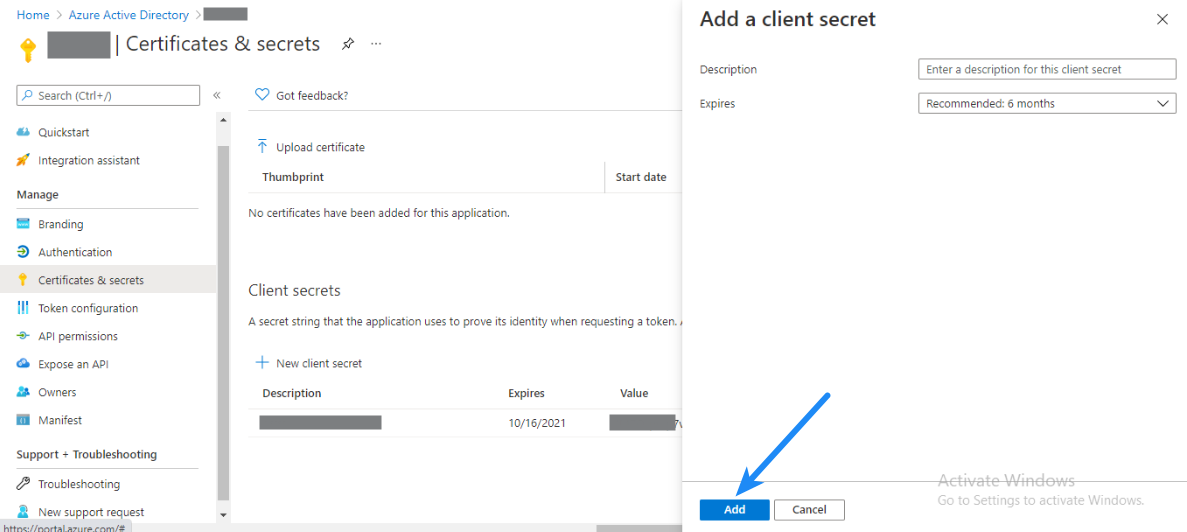
- Add a secret.
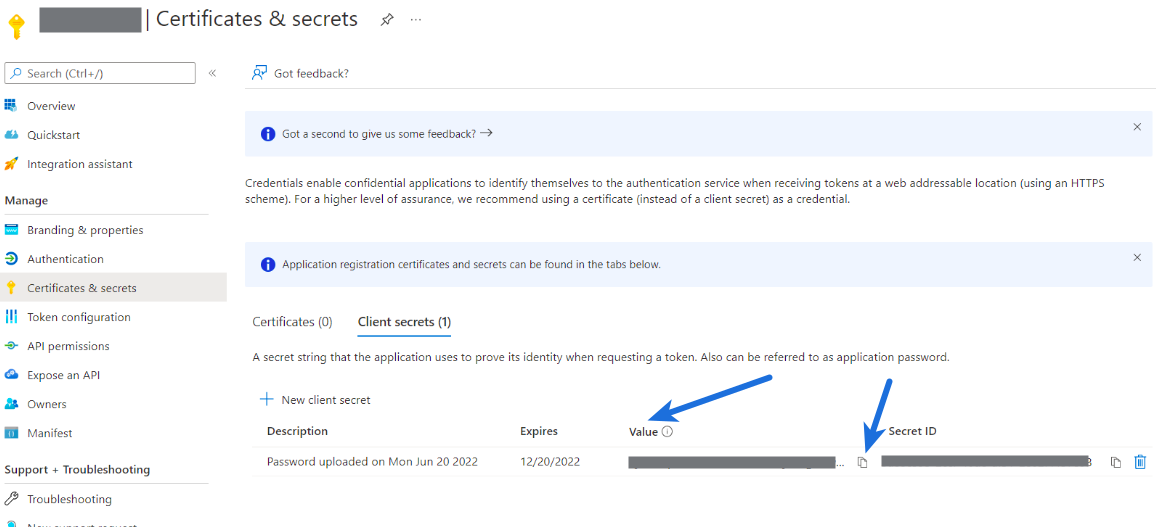
- Click the Copy icon in front of the Client Secret key in the Value column and paste it in the Microsoft Client Secret option in the Social Login configuration page of the social login plugin you are using
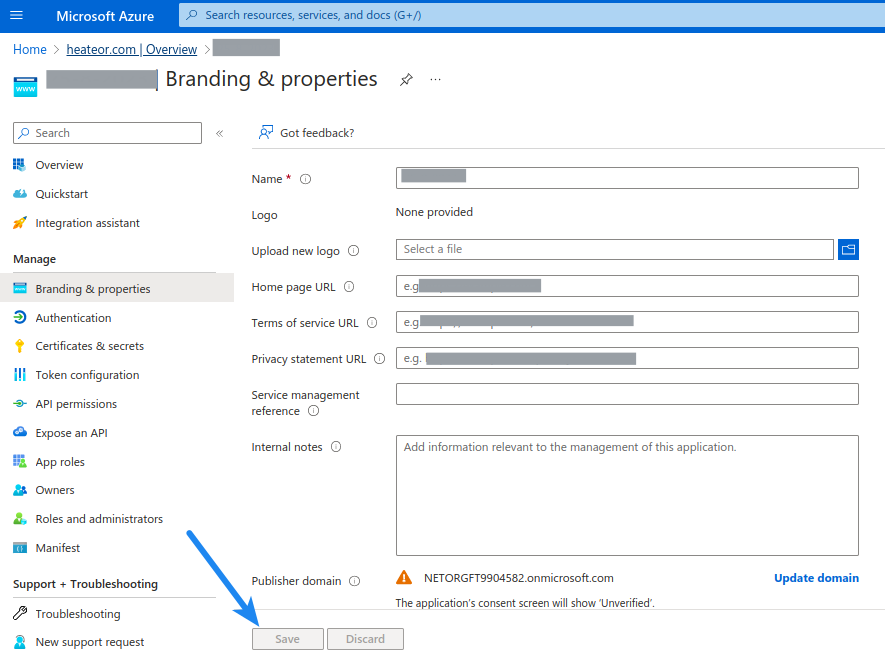
- Navigate to Branding & Properties section from the left sidebar. Here you can configure the consent screen displayed to users when they login using Microsoft first time. Configure the options as described below
Upload new logo: Logo of your website/business where you are integrating Microsoft login
Home page URL: Url of the home page of your website
Terms of service URL: Terms of service URL of your website
Privacy statement URL: URL of your website stating privacy policy where you can describe how you are going to use the profile data you will gather from the Microsoft account of the users.
Publisher domain: Click Configure a domain and do as stated if you don’t want to show Unverified app to users on the app consent screen.
Once you are done, save the changes.
- Navigate to Certificates and secrets section from the menu in left sidebar. If you already have two secrets added, you need to delete one, as there can be maximum two client secrets for an app. Click on New client secret button