If you are using Super Socializer, Heateor Login or Heateor Social Login plugin for Social Login, follow the steps mentioned below to enable Facebook login at your WordPress website or to create Facebook App ID and Secret to track Facebook shares.
Steps To Enable Facebook Login
- Navigate to Facebook Developers section and login to your Facebook account, if you are not logged in already. This should not be your business account.
If you are here first time, you will see the screen shown in the screenshot below. If you have created apps before, move to step 3.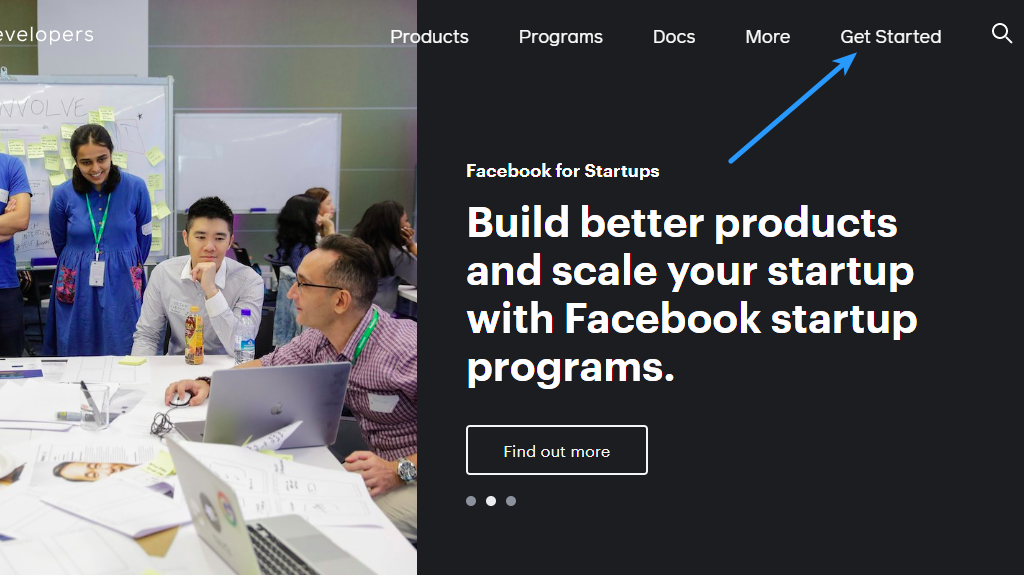
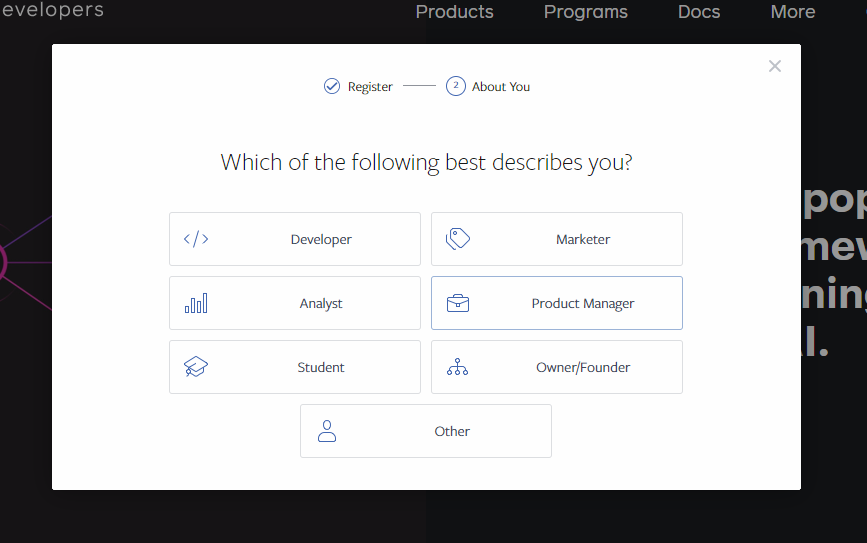
- Select the role that describes you better
 Click Create App button and navigate to step 4.
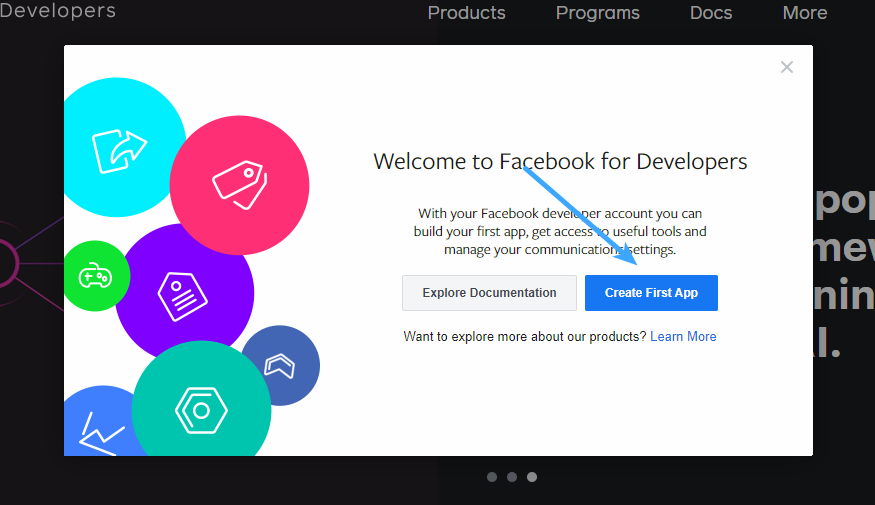
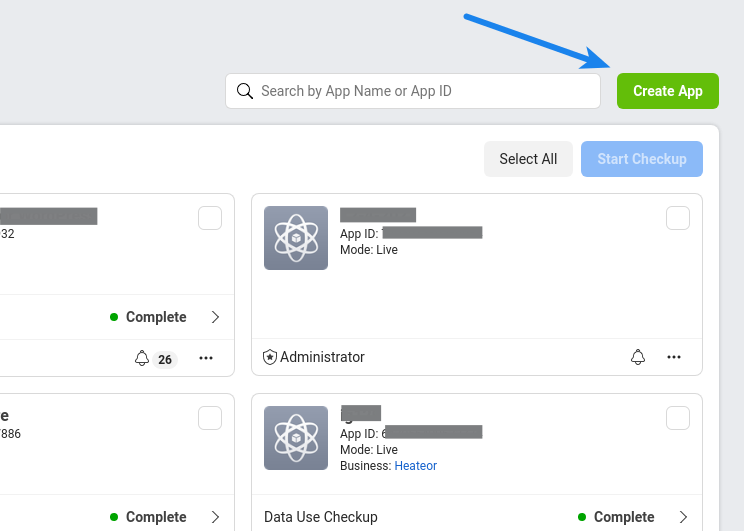
- Click My Apps and then click Create App button

- Select Other and click Next

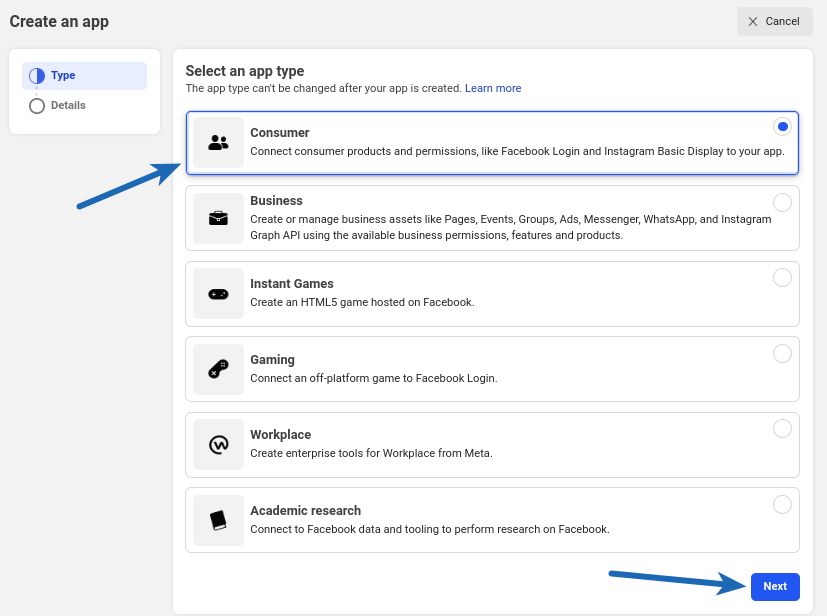
- Select Consumer and click Next
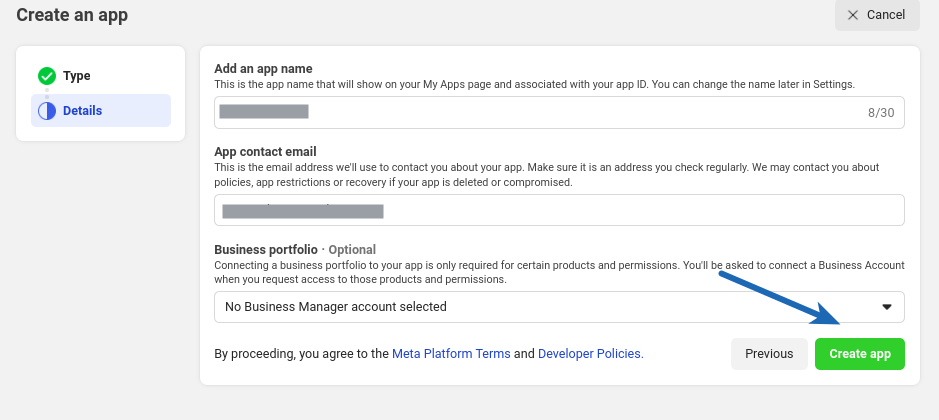
- Specify the name of your app in Add an App Name option (You can enter whatever name you like, but it’s recommended to enter your website or company name in this field), specify your App contact email. You would not want to miss any important notification from Facebook about this app so it should be a valid email address. Leave the Business portfolio option as is and click Create app button.
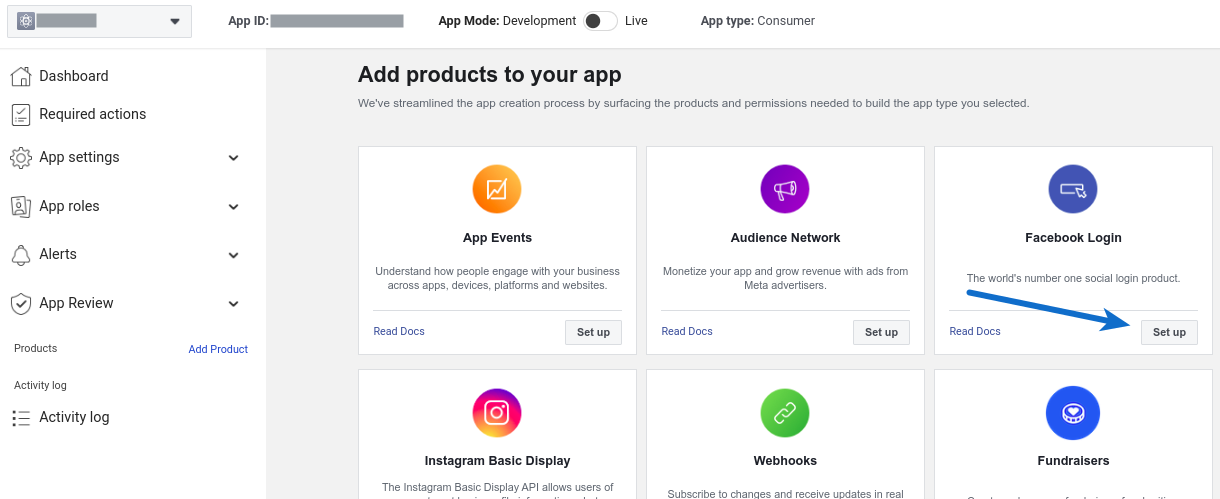
- Click Set Up in Facebook Login section
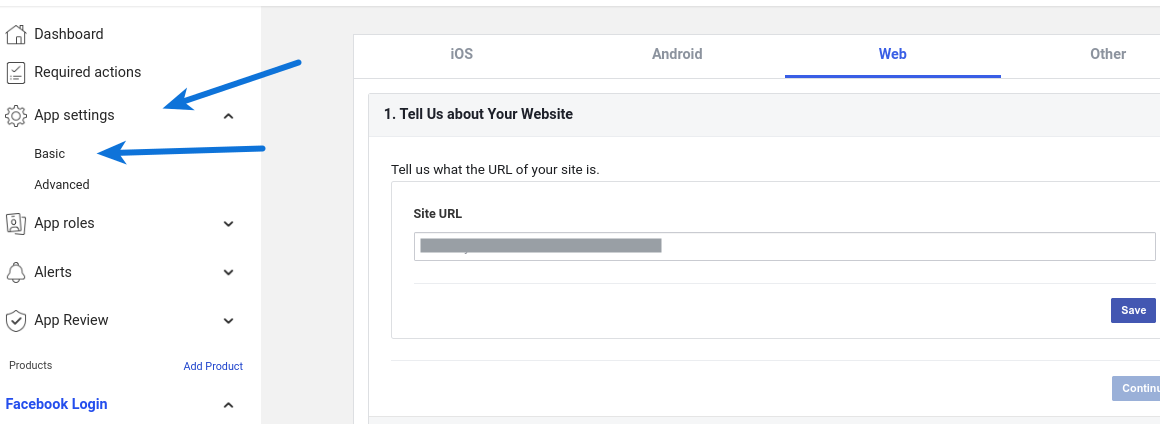
- Select Web

- Open your website homepage (at which you have installed the plugin) in browser, click the address bar so that website url gets highlighted, copy this url and paste it in Site URL option. Please make sure that this url includes http:// or https:// (for example: http://mywebsite.com or http://www.mywebsite.com)
Click Save button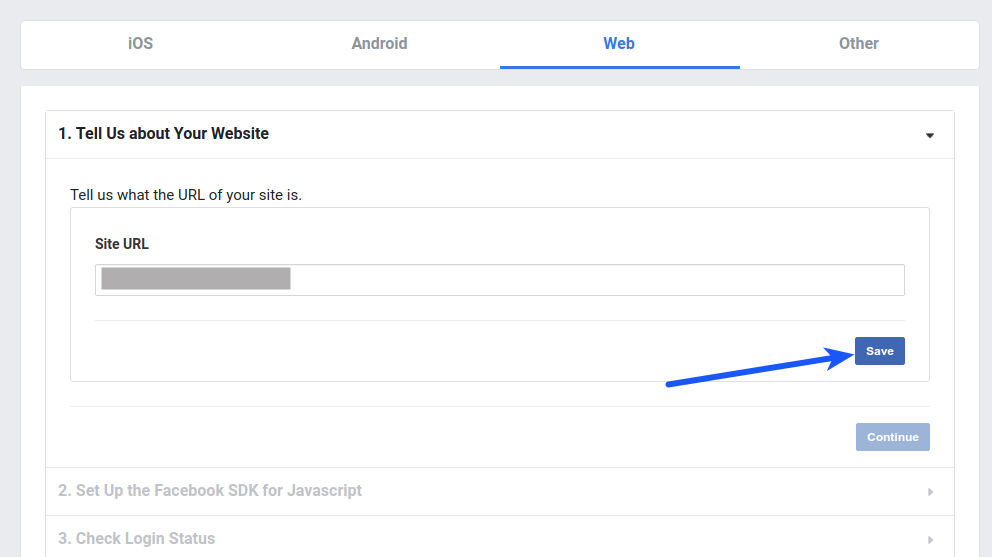
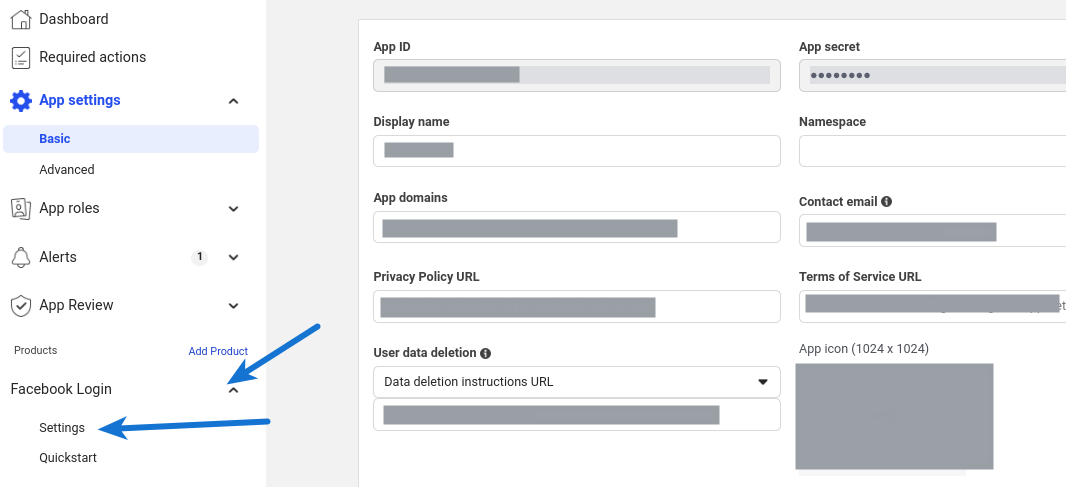
- Navigate to App settings > Basic section from the left sidebar
- Click Show button in front of App Secret. Copy App ID and App Secret and paste these in the Facebook App ID and Facebook App Secret options, respectively, in the Social Login section in the plugin settings. You need to follow the remaining steps to get the Facebook login working.
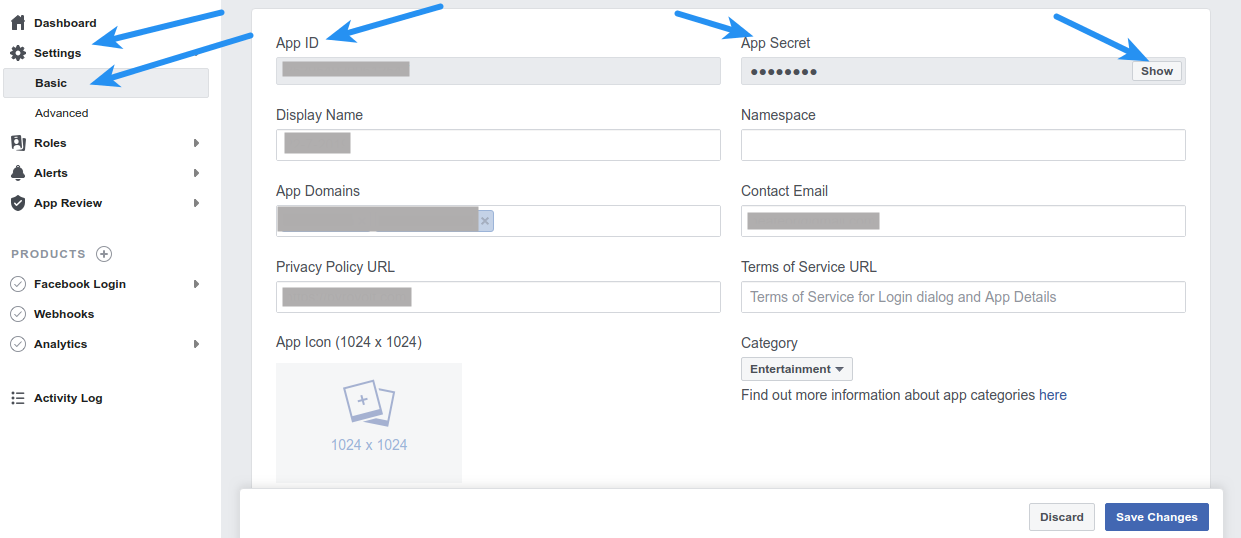
- Specify your website domain in the App Domains option. For example, if your website’s homepage URL is www.mywebsite.com or mywebsite.com, you have to save mywebsite.com and www.mywebsite.com in this option. Note that you have to save two items here (with www and without www).
Note: If your website url has directory/folder after domain (For example- http://www.mywebsite.com/dir), then save domain without directory/folder appended to it (mywebsite.com and www.mywebsite.com) in the above mentioned option.
Specify the Privacy Policy URL of your website.
Select Data Deletion Instructions URL in the User Data Deletion option and specify the same privacy policy URL in the option right below it. In the privacy policy of your website you can specify how your website visitors can get their data deleted as mentioned at the link https://support.heateor.com/gdpr-and-our-plugins/
Select the category that your website belongs to, in the Category option. Upload the App Icon representing your website. This will be shown to the users when they authorize your app while using Facebook Login.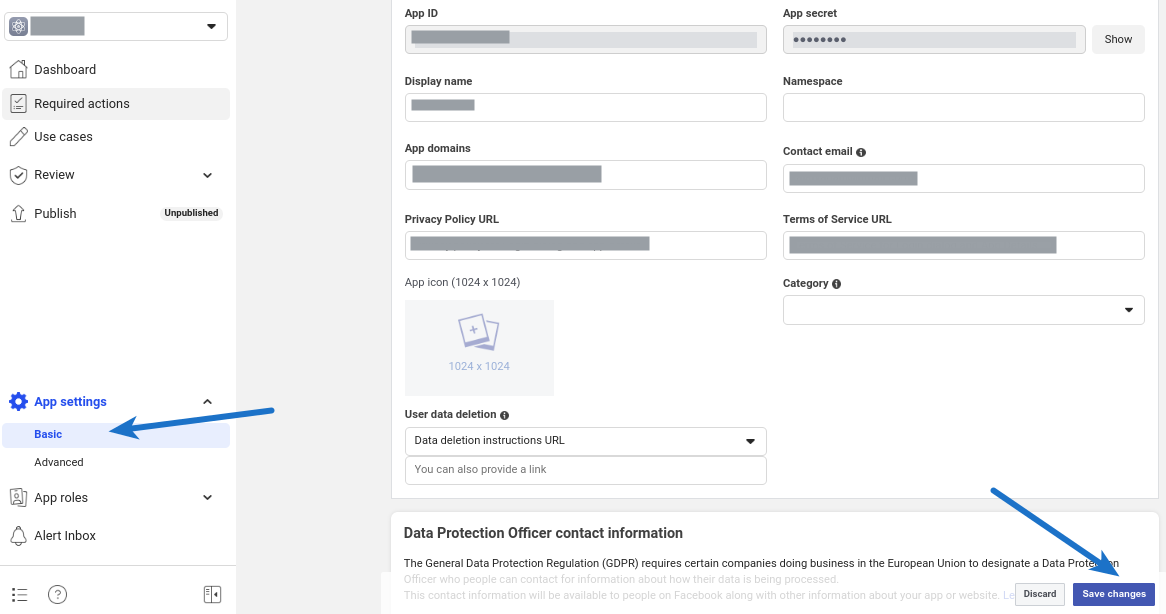
Scroll down some more. Optionally, specify the contact details of your Data Protection Officer (if you see these options and it applies to your business).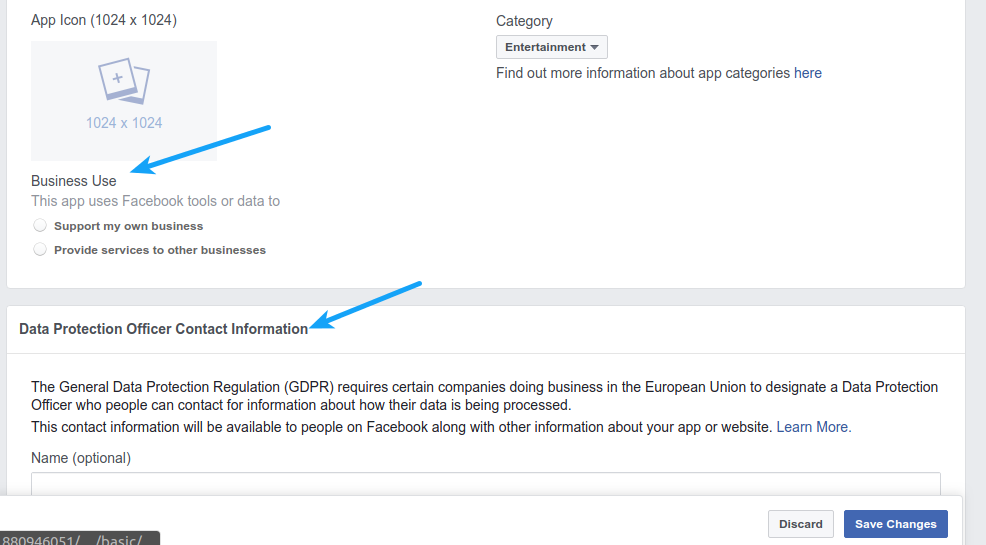
Click Save Changes button - Navigate to the Facebook Login > Settings section from the menu in the left side
- Add following URL in the Valid OAuth Redirect URIs option
If using Super Socializer plugin
Append /?SuperSocializerAuth=Facebook to the homepage url. For example, if http://mywebsite.com is the homepage url of your website, you need to save http://mywebsite.com/?SuperSocializerAuth=Facebook in this option
If using Heateor Social Login plugin
Append /?HeateorSlAuth=Facebook
to the homepage url. For example, if http://mywebsite.com is the homepage url of your website, you need to save http://mywebsite.com/?HeateorSlAuth=Facebook in this option
If using Heateor Login plugin
Append /?HeateorFblAuth=Facebook
to the homepage url. For example, if http://mywebsite.com is the homepage url of your website, you need to save http://mywebsite.com/?HeateorFblAuth=Facebook in this option
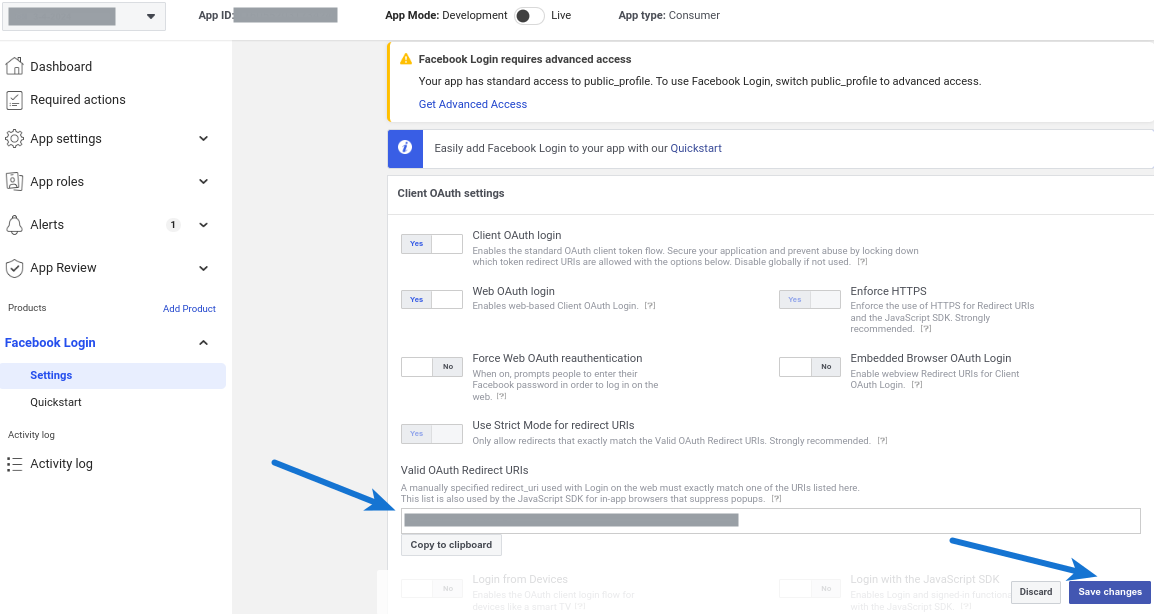
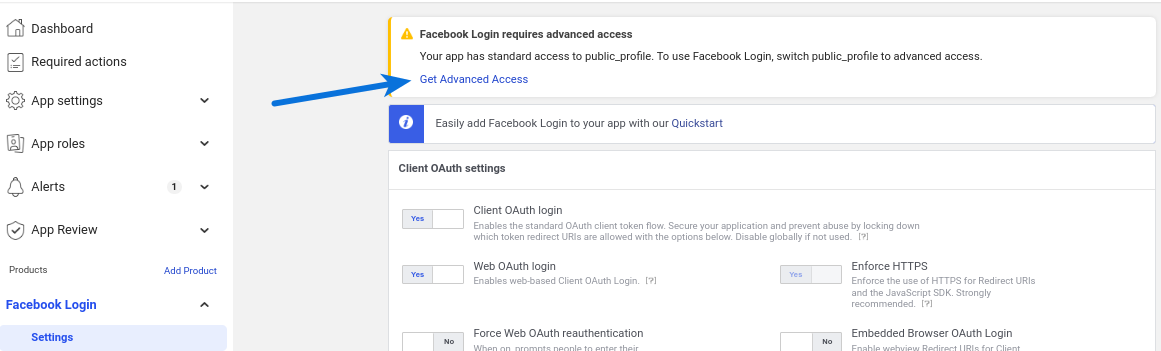
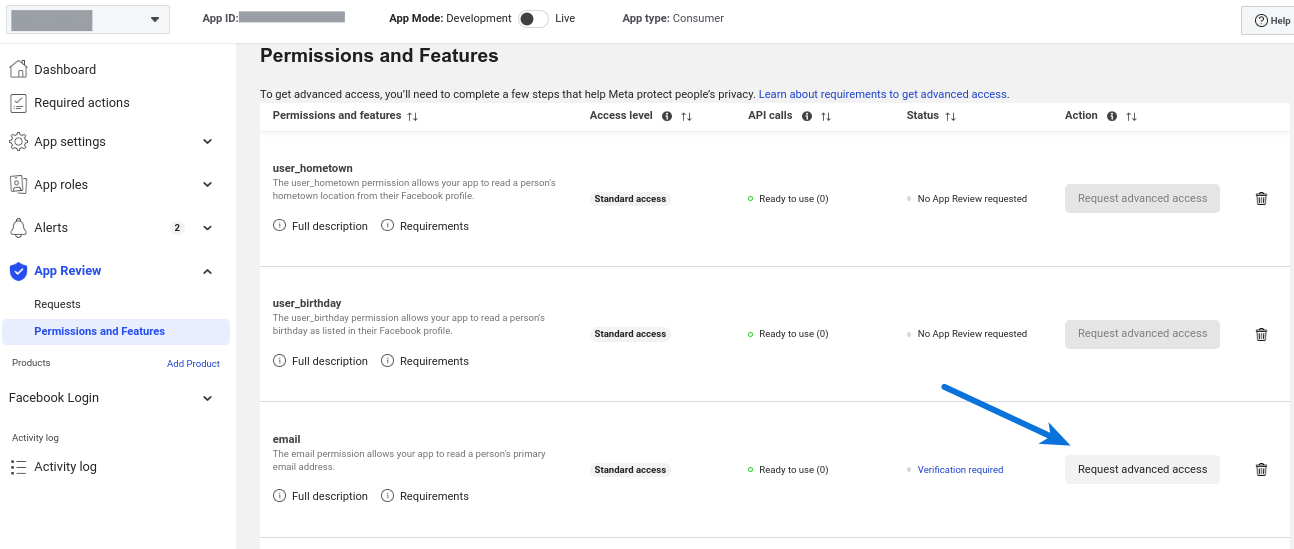
Click Save Changes button - Click Get advanced access
- Set App Mode to Live
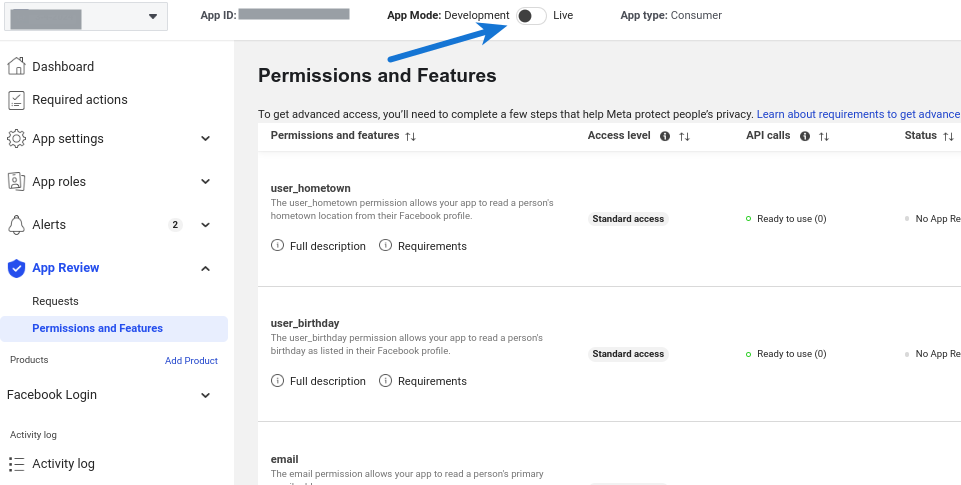
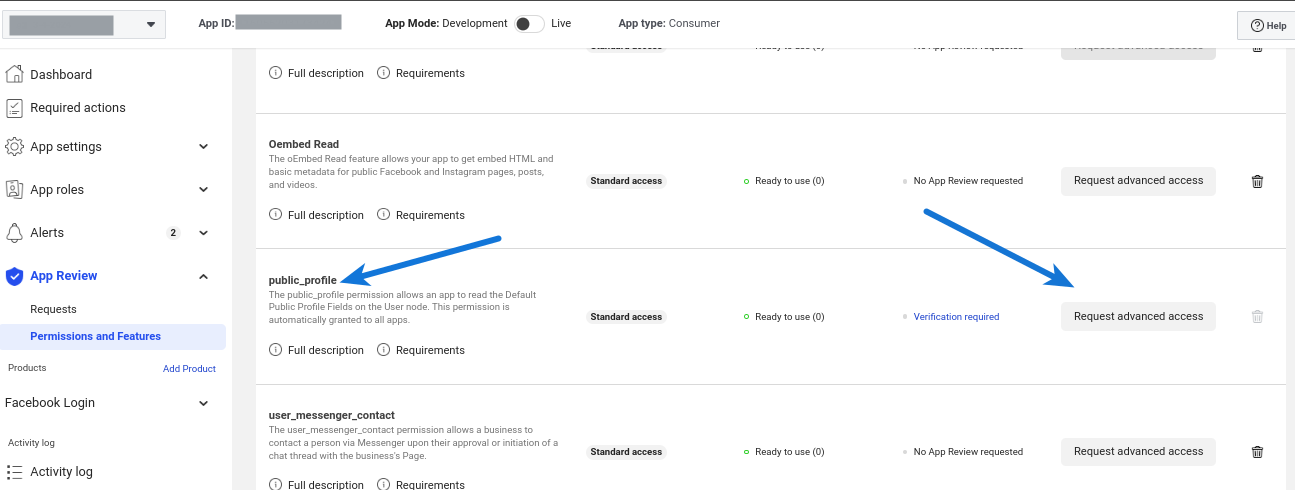
- Click Request Advanced access for email and public_profile
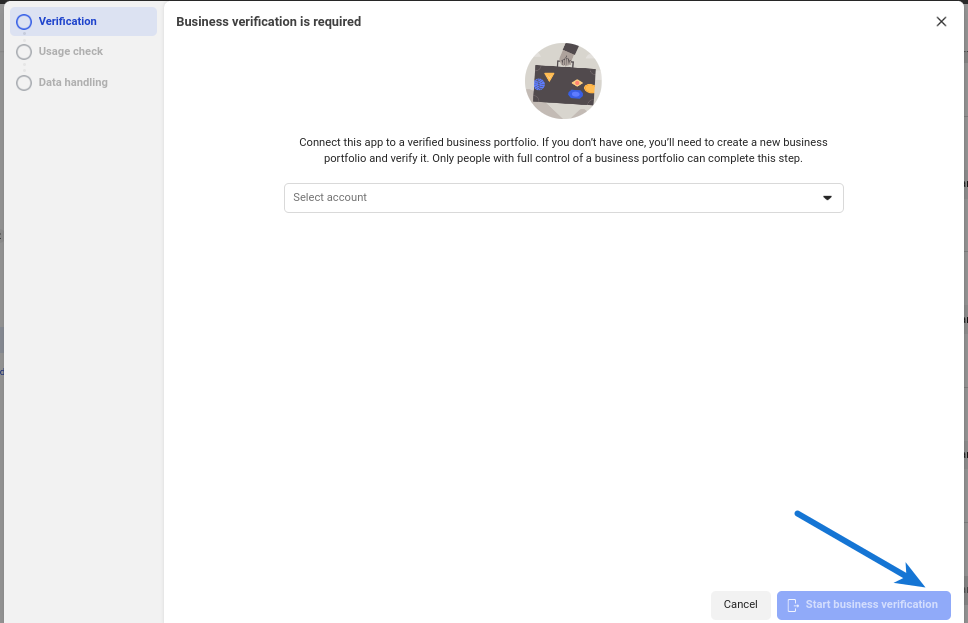
- Select your business page from the dropdown and start the verification process.
- Once you have a verified business portfolio and Facebook approves the advanced access in your app, Facebook login is ready to be used by your website visitors. Before Facebook approves advanced access, the Facebook account used to create this app and the people you add in the App roles > Roles section can use Facebook login at your website.
