If you are using Super Socializer plugin or Heateor Social Login plugin for Social Login, follow the steps mentioned below to enable LinkedIn Login at your WordPress website.
Steps To Enable LinkedIn Login
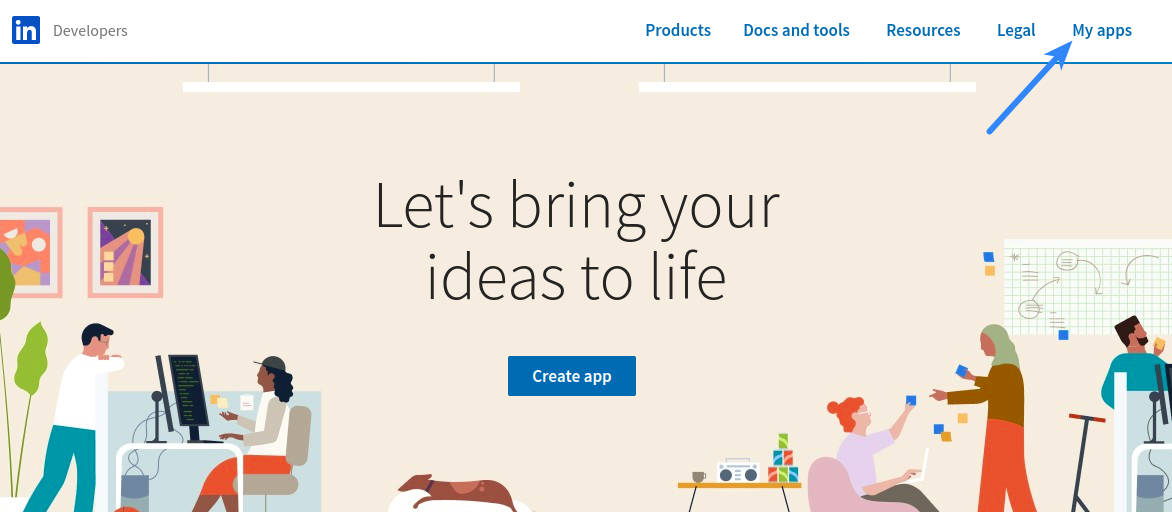
- Login to your Linkedin account. Navigate to LinkedIn Developers section and click My apps in the top-right corner. If you are not seeing this screen, skip to the next step.
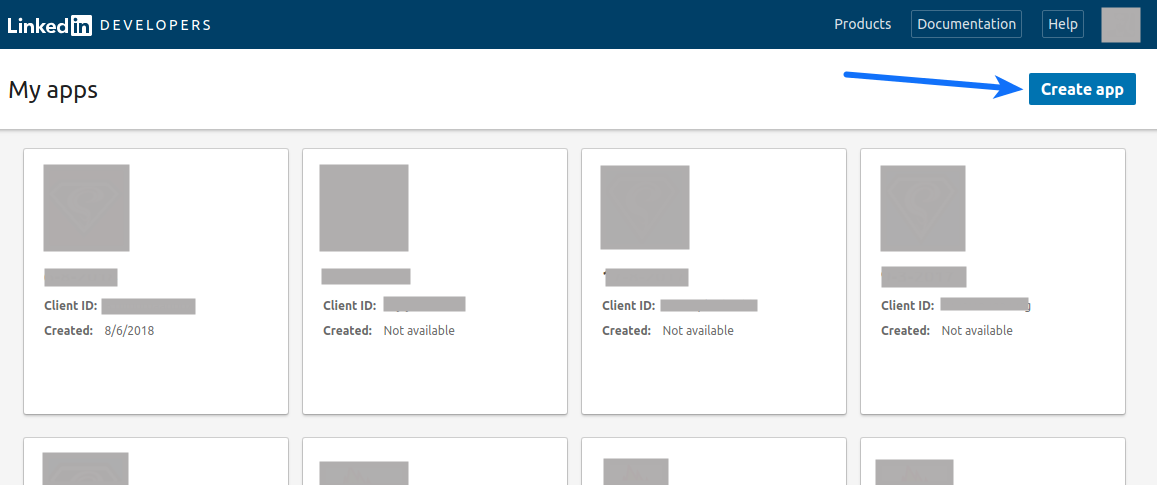
- Click Create app button. Login again, if required
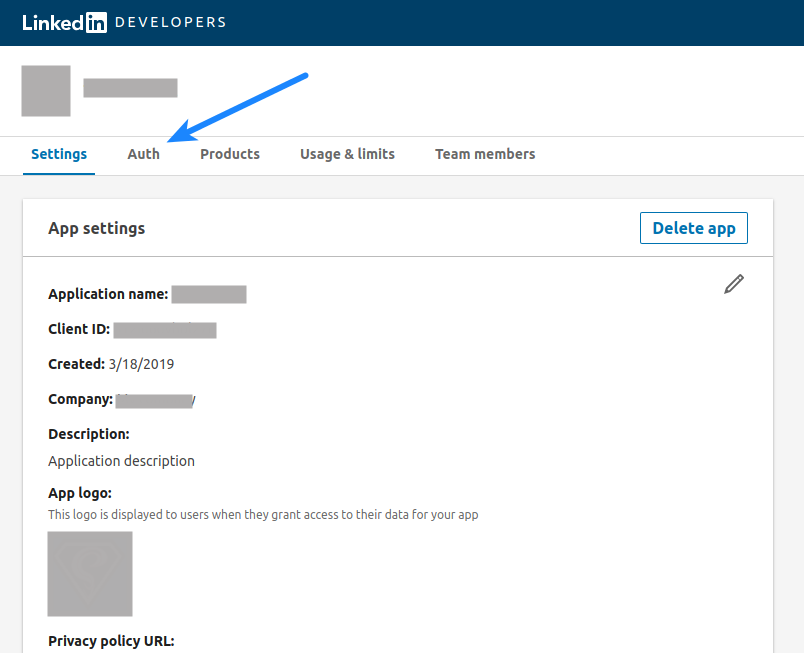
- Fill the fields as described below
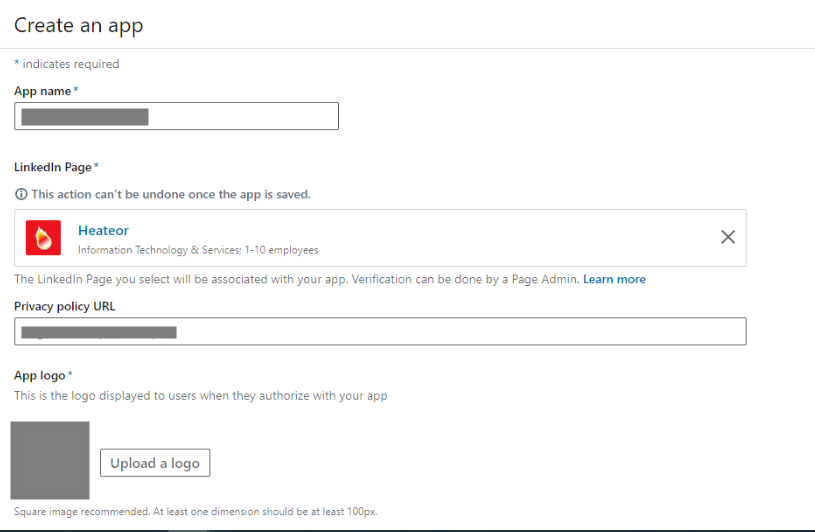
- App Name: Specify the name of your app (You can enter whatever name you like, but it’s recommended to enter your website or company name in this field)
- Linkedin Page: URL of the Linkedin Page associated to your company
- Privacy Policy URL: Optionally, you can save privacy policy URL of your website here
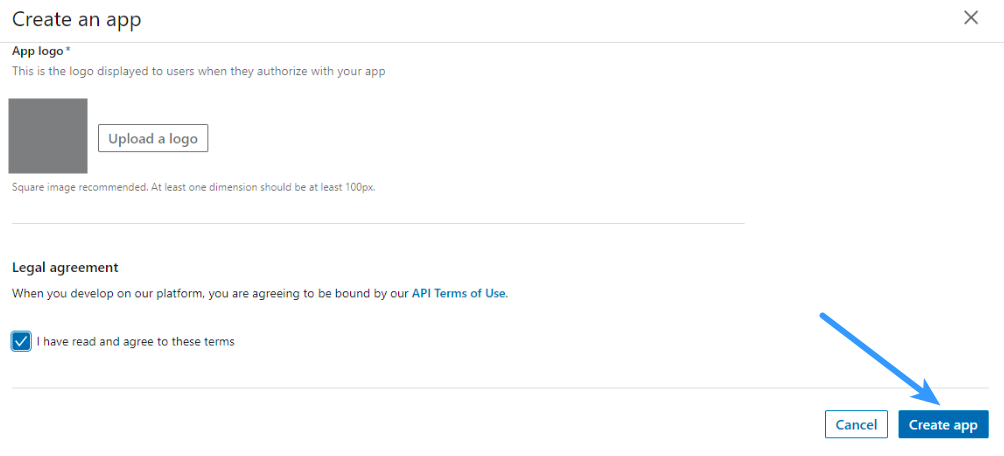
- App Logo: Logo of your company/website
- I have read and agree……: Check the checkbox
- Click Create App button
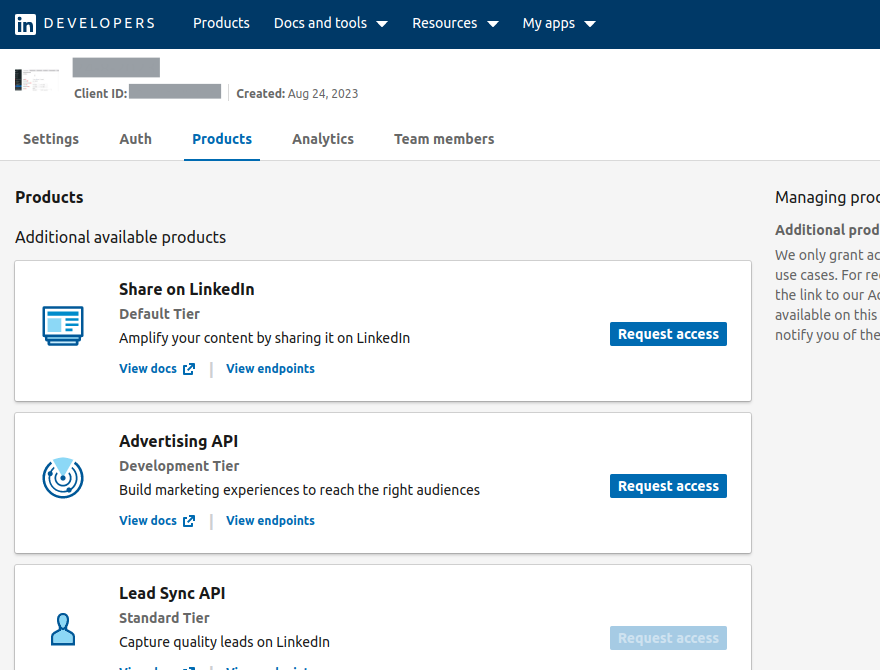
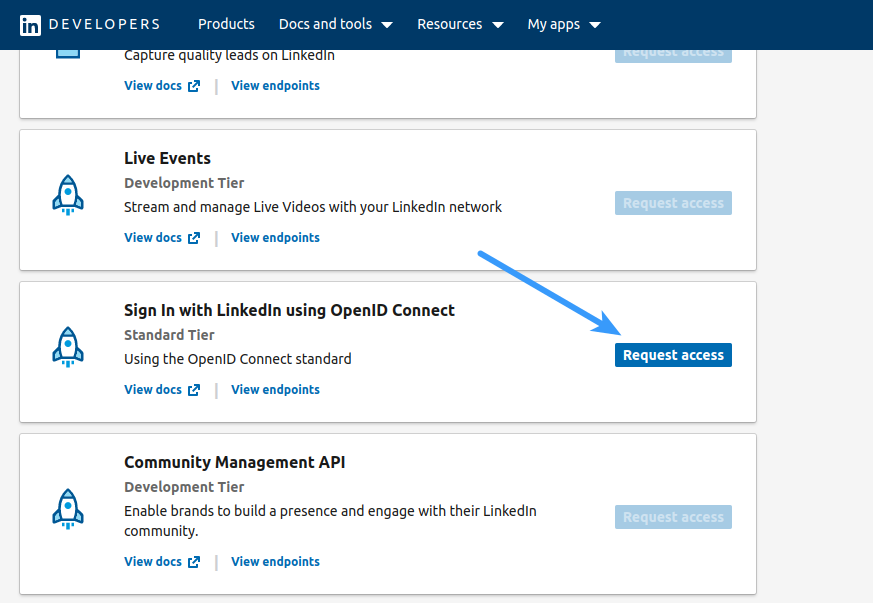
- In the Products section, Request access for Sign In with Linkedin using OpenID Connect
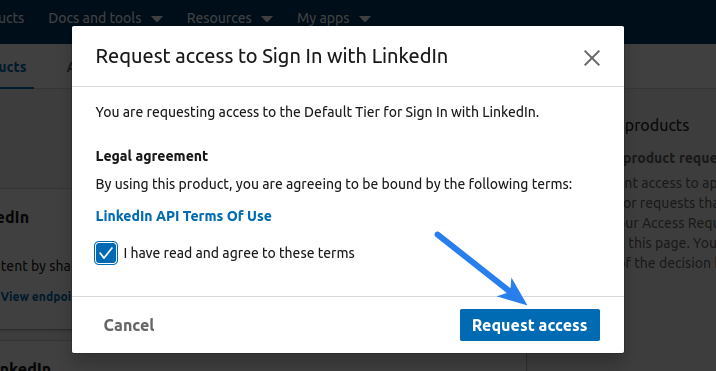
- Confirm the addition of product
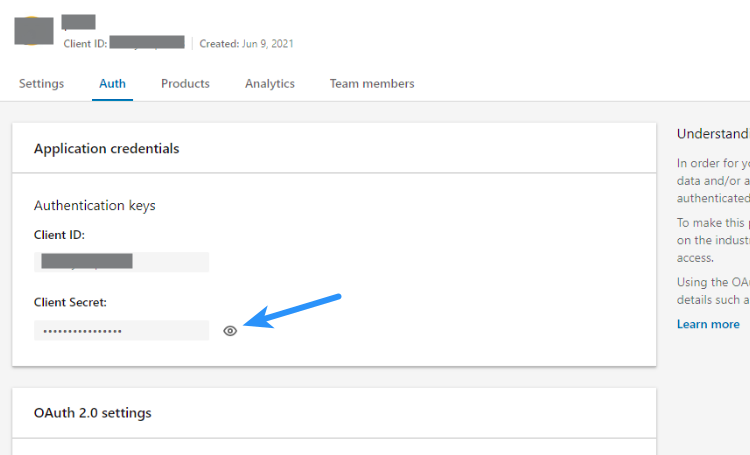
- Navigate to Auth section
- Click the eye icon after Client Secret, copy Client ID and Client Secret and paste these in the LinkedIn Client ID and LinkedIn Client Secret options at the Social Login configuration page respectively
- Open your website homepage (at which you have installed the plugin) in browser, click the address bar so that website url gets highlighted.
If using Super Socializer plugin, append /?SuperSocializerAuth=Linkedin to this homepage url.
If using Heateor Social Login plugin, append /?HeateorSlAuth=Linkedin to this homepage url.
Click the Pencil icon in front of Redirect URLs option and save this url in the option.
For example, if http://mywebsite.com is the homepage url of your website, you need to add http://mywebsite.com/?SuperSocializerAuth=Linkedin or http://mywebsite.com/?HeateorSlAuth=Linkedin in the Redirect URLs option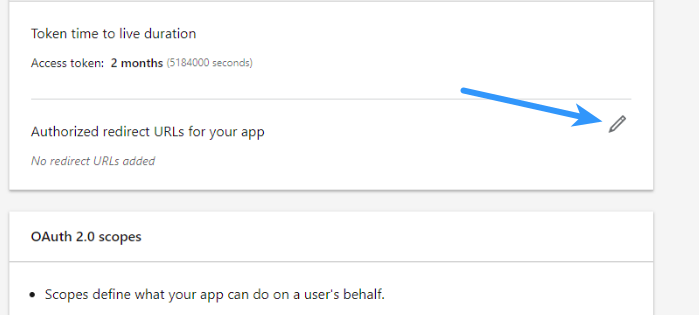
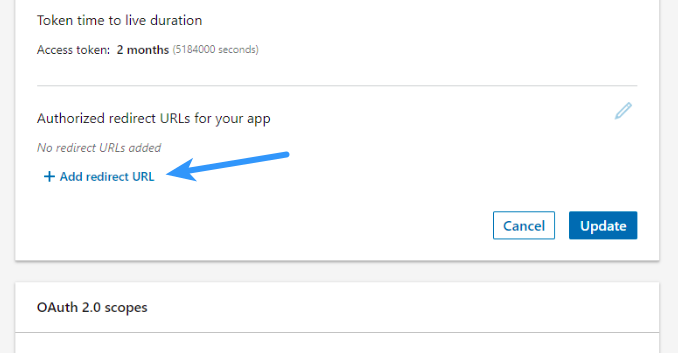
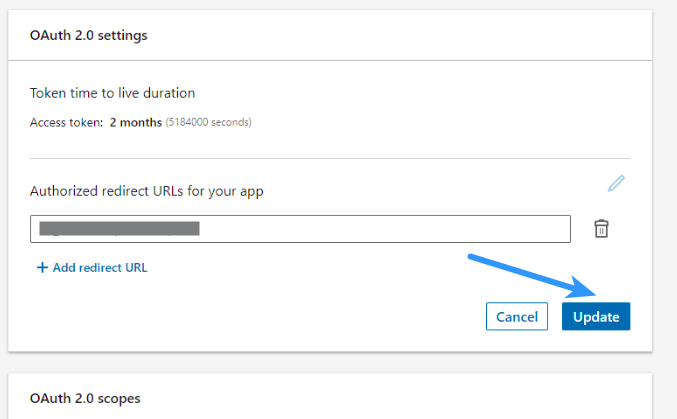
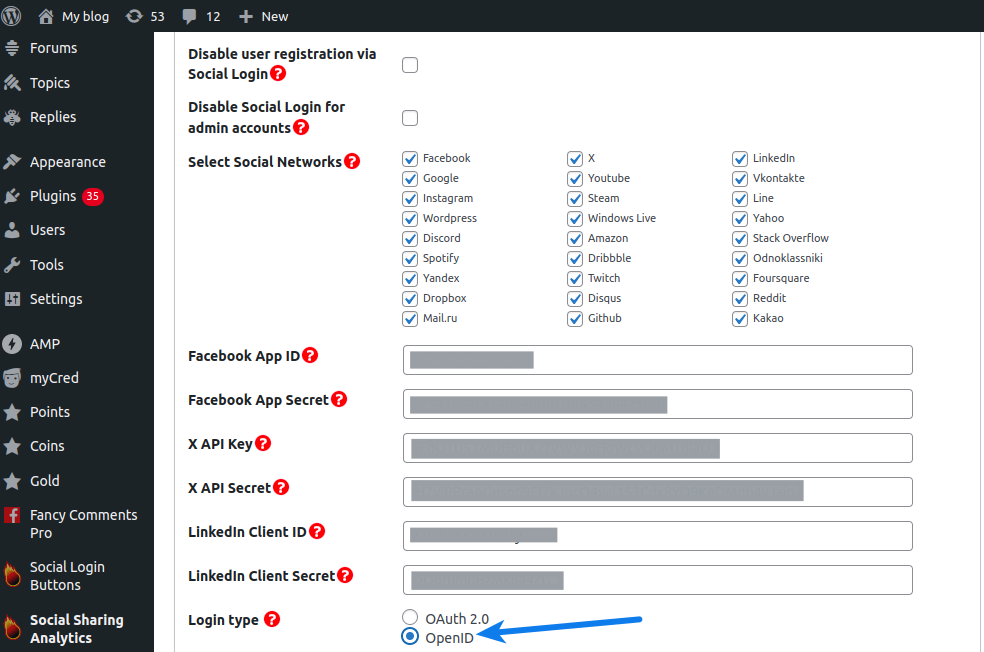
Click Update button. - Select OpenID in the Login type option at the social login configuration page and save changes.